14 KiB
Process
This document is to describe the internal process that the Ionic team uses for issue management, project planning and the development workflow.
Table of contents
Project Boards
The project boards are located under the Projects tab in GitHub: https://github.com/ionic-team/ionic/projects/
Core Project Board
The Core project board contains issues related to the @ionic/core package. A description of each column is below.
Backlog 🤖
Contains up to 20 issues that are important to work on soon but we don't think we can fit in the current sprint. If we finish everything we planned for the week we can pull from this column. Issues will automatically move to this column when they are added to the project board.
On Deck ⚾
Contains issues that we believe we can accomplish in the current sprint. Issues should be manually moved to this column when we have our sprint planning meeting.
In Progress 🤺
Issues and pull requests that are currently being worked on. Issues should be manually moved to this column and assigned to yourself when you begin working on them. Pull requests are automatically added to this column when added to the project board.
Needs Review 🤔
Issues and pull requests that need review. Pull requests will automatically move here when a reviewer requests changes, or it no longer meets the minimum number of required approving reviews.
Done 🎉
Issues and pull requests that are completed. Issues will automatically move here when they are closed. Pull requests will automatically moved here when they are merged or closed with unmerged commits.
Managing Issues
Issues to Triage
The issues that need to be triaged all have the triage label. In many cases the issue can be automatically processed by the Ionic Issue Bot by applying a specific label.
Once another label is applied to the issue, the triage label is automatically removed by the bot.
Wrong Repository
If an issue does not pertain to the Ionic Framework but does pertain to another repository, it should be moved to that repository. The bot has been set up to automatically create the issue in other repositories while closing and locking the issue in this repository. Use one of the following labels to perform that action:
- ionitron: cli
- ionitron: docs
- ionitron: stencil
- ionitron: native
Ionic Appflow Issues
If the issue is associated with Ionic Appflow the submitter should be told to use the Ionic Appflow Support Forum. The issue should be closed and locked. Use the ionitron: ionic appflow label to accomplish this.
Support Questions
If the issue is a support question, the submitter should be redirected to our forum or slack channel. The issue should be closed and locked. Use the ionitron: support label to accomplish this.
Incomplete Template
If the issue template has not been filled out completely, the issue should be closed and locked. The submitter should be informed to re-submit the issue making sure they fill the form out completely. Use the ionitron: missing template label to accomplish this.
Issues with Open Questions
In many cases, the template is mostly filled out but just missing a thing or two or you may have a question or need clarification. In such a case, the submitter should be asked to supply that information.
- add a comment requesting the additional information or clarification
- add the
needs: replylabel to the task
NOTE: be sure to perform those actions in the order stated. If you add the comment second it will trigger the removal of the label.
If there is a response to the question, the bot will remove the needs: reply and apply the triage label. The issue will then go through the triage handling again.
If there is no response within 30 days, the issue will be closed and locked.
Workflow
Overview
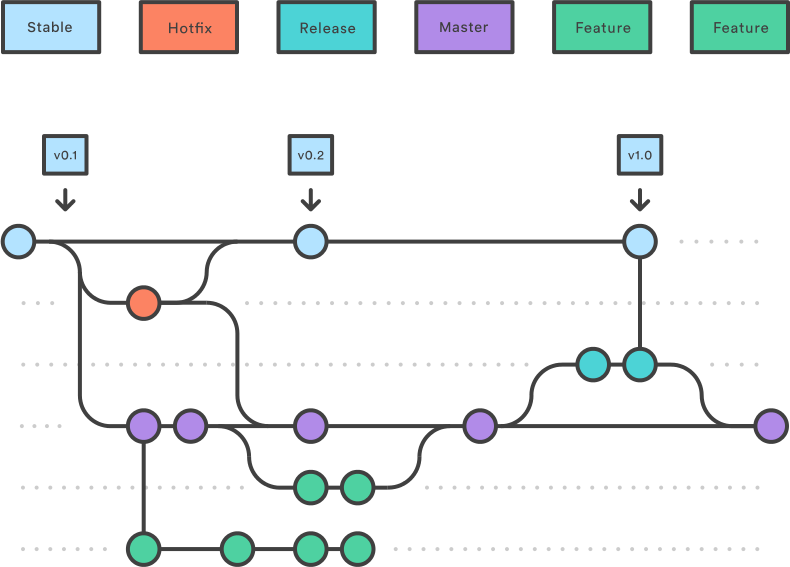
We have two long-living branches:
master: completed features, bug fixes, refactors, choresstable: the latest release
The overall flow:
- Feature, refactor, and bug fix branches are created from
master - When a feature, refactor, or fix is complete it is merged into
master - A release branch is created from
master - When the release branch is done it is merged into
masterandstable - If an issue in
stableis detected a hotfix branch is created fromstable - Once the hotfix is complete it is merged to both
masterandstable - All branches should follow the syntax of
{type}-{details}where{type}is the type of branch (hotfix,release, or one of the commit types) and{details}is a few hyphen separated words explaining the branch
Stable and Master Branches
Stable Branch
Branches created from stable:
The following branch should be merged back to both master and stable:
- A
hotfixbranch (e.g.hotfix-missing-export): a bug fix that is fixing a regression or issue with a published release
A hotfix branch should be the only branch that is created from stable.
Master Branch
Branches created from master:
The following branches should be merged back to master via a pull request:
- A feature branch (e.g.
feat-desktop-support): an addition to the API that is not a bug fix or regression fix - A bug fix branch (e.g.
fix-tab-color): a bug fix that is not fixing a regression or issue with a published release - All other types listed in the commit message types:
docs,style,refactor,perf,test,chore
The following branch should be merged back to both master and stable:
- A
releasebranch (e.g.release-4.1.x): contains all fixes and (optionally) features that are tested and should go into the release
Feature Branches
Each new feature should reside in its own branch, based on the master branch. When a feature is complete, it should go into a pull request that gets merged back into master. A pull request adding a feature should be approved by two team members. Features should never interact directly with stable.
Release Branches
Once master has acquired enough features for a release (or a predetermined release date is approaching), fork a release branch off of master. Creating this branch starts the next release cycle, so no new features can be added after this point - only bug fixes, documentation generation, and other release-oriented tasks should go in this branch.
Once the release is ready to ship, it will get merged into stable and master, then the release branch will be deleted. It’s important to merge back into master because critical updates may have been added to the release branch and they need to be accessible to new features. This should be done in a pull request after review.
See the steps for releasing below for detailed information on how to publish a release.
Version Branches
Once a release has shipped and the release branch has been merged into stable and master it should also be merged into its corrsponding version branch. These version branches allow us to ship updates for specific versions of the framework (i.e. Lets us ship a bug fix that only affects 4.2.x).
Patch releases should be merged into their corresponding version branches. For example, a release-4.1.1 branch should be merged into the 4.1.x version branch and a release-5.0.1 branch should be merged into the 5.0.x version branch.
When releasing a major version such as 5.0.0 or a minor version such as 4.1.0 , the version branch will not exist. The version branch should be created once the release branch has been merged into stable and master. For example, when releasing 4.1.0, the release-4.1.0 release branch should be merged into stable and master and then the 4.1.x version branch should be created off the latest stable.
Hotfix Branches
Maintenance or “hotfix” branches are used to quickly patch production releases. This is the only branch that should fork directly off of stable. As soon as the fix is complete, it should be merged into both stable and master (or the current release branch).
Examples
Making a Change
-
Create a branch from
master. -
Make changes. Limit your changes to a "unit of work", meaning don't include irrelevant changes that may confuse and delay the change.
-
Push changes.
-
Create a PR with the base of
master. -
Have someone approve your change (optional right now--at your discretion).

-
Wait for status checks to succeed. Fix errors if any occur.

-
Click Squash and merge. Use the dropdown to select this option if necessary.

-
During confirmation, rewrite the commit message using our Commit Message Format guidelines. Keep the
(#1234)at the end; it will create a link to the PR in the commit history andCHANGELOG.md. This is where commits onmasterbecome permanent.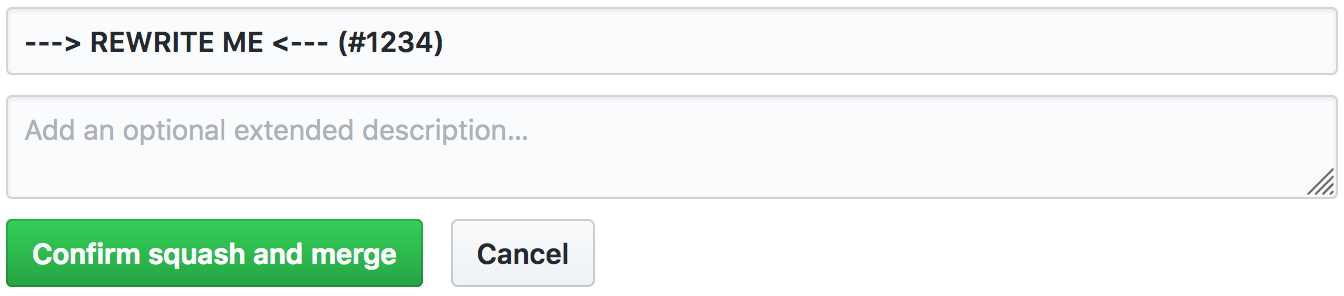
-
Confirm squash and merge into
master.
Updating from master
- Pull the latest changes locally.
- Merge the changes, fixing any conflicts.
- Push the merged changes.
OR
-
Click Update branch on the PR:

-
Pull the merged changes locally.
Hotfixes
Hotfixes bypass master and should only be used for urgent fixes that can't wait for the next release to be ready.
-
Create a branch from
stable. -
Make changes.
-
Run
npm run release.prepare. -
Push changes.
-
Create a PR, making sure the PR will merge into
stable. -
Click Squash and merge. Use the dropdown to select this option if necessary.
-
During confirmation, rewrite the commit message using our Commit Message Format guidelines. Keep the
(#1234)at the end; it will create a link to the PR in the commit history andCHANGELOG.md. This is where commits onmasterbecome permanent.
-
Confirm squash and merge into
stable. -
CI builds
stable, performing the release. -
Create a PR to merge
stableintomaster. -
Click Merge pull request. Use the dropdown to select this option if necessary.

Releasing
-
Create the release branch from
master, for example:release-4.5.0. -
For major or minor releases, create a version branch based off the latest version branch. For example, if releasing 4.5.0, create a branch called
4.5.xbased off4.4.x. -
Submit a pull request from the release branch into the version branch. Do not merge this pull request yet.
-
Verify all tests are passing, fix any bugs if needed and make sure no undesired commits are in.
-
Navigate to the root of the repository while on the release branch.
-
Run
npm iif it hasn't already been done. -
Run
npm run release.prepare- Select the version based on the type of commits and the Ionic Versioning
- After the process completes, verify the version number in all packages (
core,docs,angular) - Verify the changelog commits are accurate and follow the proper format
- For major or minor releases, ensure that the version number has an associated title (for example:
4.5.0 Boron) - Commit these changes with the version number as the message, e.g.
git commit -m "4.5.0"
-
Run
npm run release -
Click Merge pull request. Use the dropdown to select this option if necessary.
-
Rewrite the commit message to
merge release-[VERSION]with the proper release branch. For example, if this release is for4.5.0, the message would bemerge release-4.5.0. -
Submit a pull request from the release branch into
master. Merge this pull request using the same commit format in the last step, to ensure any changes made on the release branch get added to future releases.