1 line
37 KiB
JSON
1 line
37 KiB
JSON
{"api":"# api\n\n\n> The tiny framework for building web interfaces.\n\n- **Do more with less**—We have minimized the concepts you need to learn to be productive. Views, actions, effects, and subscriptions are all pretty easy to get to grips with and work together seamlessly.\n- **Write what, not how**—With a declarative syntax that's easy to read and natural to write, Hyperapp is your tool of choice to develop purely functional, feature-rich, browser-based applications.\n- **Hypercharged**—Hyperapp is a modern VDOM engine, state management solution, and application design pattern all-in-one. Once you learn to use it, there'll be no end to what you can do.\n\nTo learn more, go to <https://hyperapp.dev> for documentation, guides, and examples.\n\n## Quickstart\n\nInstall Hyperapp with npm or Yarn:\n\n```console\nnpm i hyperapp\n```\n\nThen with a module bundler like [Parcel](https://parceljs.org) or [Webpack](https://webpack.js.org) import it in your application and get right down to business.\n\n```js\nimport { h, app } from \"hyperapp\"\n```\n\nDon't want to set up a build step? Import Hyperapp in a `<script>` tag as a module. Don't worry; modules are supported in all evergreen, self-updating desktop, and mobile browsers.\n\n```html\n<script type=\"module\">\n import { h, app } from \"https://unpkg.com/hyperapp\"\n</script>\n```\n\nHere's the first example to get you started: a counter that can go up or down. You can try it online [here](https://codesandbox.io/s/hyperapp-playground-fwjlo).\n\n```html\n<!DOCTYPE html>\n<html lang=\"en\">\n <head>\n <script type=\"module\">\n import { h, app } from \"https://unpkg.com/hyperapp\"\n\n app({\n init: 0,\n view: state =>\n h(\"main\", {}, [\n h(\"h1\", {}, state),\n h(\"button\", { onClick: state => state - 1 }, \"-\"),\n h(\"button\", { onClick: state => state + 1 }, \"+\")\n ]),\n node: document.getElementById(\"app\")\n })\n </script>\n </head>\n <body>\n <main id=\"app\"></main>\n </body>\n</html>\n```\n\nThe app starts off with `init` as the initial state. Our code doesn't explicitly maintain any state. Instead, we define actions to transform it and a view to visualize it. The view returns a plain object representation of the DOM known as a virtual DOM, and Hyperapp updates the real DOM to match it whenever the state changes.\n\nNow it's your turn! Experiment with the code a bit. Spend some time thinking about how the view reacts to changes in the state. Can you add a button that resets the counter back to zero? Or how about multiple counters?\n\n## Help, I'm stuck!\n\nWe love to talk JavaScript and Hyperapp. If you've hit a stumbling block, hop on the [Hyperapp Slack](https://hyperappjs.herokuapp.com) or drop by [Spectrum](https://spectrum.chat/hyperapp) to get support, and if you don't receive an answer, or if you remain stuck, please file an issue, and we'll try to help you out.\n\nIs anything wrong, unclear, missing? Help us [improve this page](https://github.com/jorgebucaran/hyperapp/fork).\n\n## Stay in the loop\n\n- [Twitter](https://twitter.com/hyperappjs)\n- [Awesome](https://github.com/jorgebucaran/awesome-hyperapp)\n- [/r/hyperapp](https://www.reddit.com/r/hyperapp)\n\n## License\n","ecosystem":"# ecosystem\n\nLorem ipsum dolor sit amet, consectetur adipiscing elit. In lobortis dignissim tellus, eget vestibulum leo feugiat vel. Fusce ac odio at nulla feugiat tincidunt. Cras eu metus varius, placerat ex nec, commodo felis. Morbi ac tempus ligula, eget finibus mi. Maecenas porttitor est a lacus suscipit luctus. Suspendisse ornare mattis purus eu mollis. Maecenas pellentesque sem quam, eu imperdiet ante lobortis in. Interdum et malesuada fames ac ante ipsum primis in faucibus. Curabitur purus lectus, sollicitudin in tempus vel, dignissim vitae nibh. In eu elit non elit dapibus dignissim eu congue diam. Nullam ut tellus et erat egestas consectetur eu ut lorem.\n","guides":"# guides\nlorem lorem\n\nPellentesque habitant morbi tristique senectus et netus et malesuada fames ac turpis egestas. In id turpis et nibh commodo viverra et eu nisl. Pellentesque imperdiet dapibus aliquam. Cras vulputate viverra neque nec ultricies. Mauris consectetur vulputate eleifend. Interdum et malesuada fames ac ante ipsum primis in faucibus. Maecenas a auctor augue. Donec iaculis urna eget nisi maximus, vel aliquam magna volutpat. Mauris mattis ac augue non pharetra. Aliquam erat volutpat. Vestibulum ultricies, turpis ac pretium fringilla, quam ante tincidunt nisi, quis venenatis turpis odio sed libero. Nullam pulvinar tempor elit, gravida eleifend odio viverra non.\n","quickstart":"## quickstart\n\n1․ Install Hyperapp with npm or Yarn:\n\n---\n```console\nnpm i hyperapp\n```\n---\n\n\n\n\n2․ Then with a module bundler like [Parcel](https://parceljs.org) or [Webpack](https://webpack.js.org) import it in your application and get right down to business.\n\n---\n```js\nimport { h, app } from \"hyperapp\"\n```\n---\n\n\n\n\n3․ Don't want to set up a build step? Import Hyperapp in a `<script>` tag as a module. Don't worry; modules are supported in all evergreen, self-updating desktop, and mobile browsers.\n\n---\n```html\n<script type=\"module\">\n import { h, app } from \"https://unpkg.com/hyperapp\"\n</script>\n```\n---\n\n\n\n\nHere's the first example to get you started: a counter that can go up or down. You can try it online [here](https://codesandbox.io/s/hyperapp-playground-fwjlo).\n\n---","sponsor":"# sponsor\nlorem lorem lorem\n\nIn urna ex, finibus sit amet laoreet id, pharetra placerat lorem. Suspendisse laoreet pulvinar nunc, sed tristique ex venenatis tristique. Quisque non vulputate enim, vitae facilisis sapien. Nunc sagittis vel mi et tristique. In ornare leo et lectus ornare, vel pretium odio vulputate. Nam rhoncus quam vel neque rhoncus rutrum. Quisque posuere, purus sit amet ornare blandit, massa ligula sagittis magna, ut interdum purus neque et nisl. Integer eros sapien, faucibus at est vel, rhoncus gravida arcu. In volutpat sapien neque, vel malesuada sapien aliquam at.\n","tutorial":"Welcome! If you're new to Hyperapp, you've found the perfect place to start learning.\n\nTable of contents\n\n- [The Set-up](#setup)\n- [Hello World](#helloworld)\n- [View](#view)\n - [Virtual Nodes](#virtualnodes)\n - [Rendering to the DOM](#rendertodom)\n - [Composing the view with reusable functions](#composingview)\n- [State](#state)\n- [Actions](#actions)\n - [Reacting to events in the DOM](#reacting)\n - [Capturing event-data in actions](#eventdata)\n - [Actions with custom payloads](#custompayloads)\n - [Payload filters](#payloadfilters)\n- [Effects](#effects)\n - [Declaring effects in actions](#declaringeffects)\n - [Effect functions and `dispatch`](#effectfunctions)\n - [Running effects on initialization](#effectsoninit)\n - [Effect creators](#effectcreators)\n - [Tracking state for ansynchronous effects](#trackingasync)\n- [Subscriptions](#subscriptions)\n - [Subscription functions](#subscriptionfunctions)\n - [Subscribing](#subscribing)\n- [Conclusion](#conclusion)\n\n## The Set-up <a name=\"setup\"></a>\n\nTogether we'll build a simple newsreader-like application. As we do, we'll work\nour way through the five core concepts: view, state, actions, effects and subscriptions.\n\nTo move things along, let's imagine we've already made a static version of the\napp we want to build, with this HTML:\n\n```html\n<div id=\"app\" class=\"container\">\n <div class=\"filter\">\n Filter:\n <span class=\"filter-word\">ocean</span>\n <button>✎</button>\n </div>\n <div class=\"stories\">\n <ul>\n <li class=\"unread\">\n <p class=\"title\">The <em>Ocean </em>is Sinking</p>\n <p class=\"author\">Kat Stropher</p>\n </li>\n <li class=\"reading\">\n <p class=\"title\"><em>Ocean </em>life is brutal</p>\n <p class=\"author\">Surphy McBrah</p>\n </li>\n <li>\n <p class=\"title\">\n Family friendly fun at the\n <em>ocean </em>exhibit\n </p>\n <p class=\"author\">Guy Prosales</p>\n </li>\n </ul>\n </div>\n <div class=\"story\">\n <h1>Ocean life is brutal</h1>\n <p>\n Lorem ipsum dolor sit amet, consectetur adipiscing elit, sed do eiusmod\n tempor incididunt ut labore et dolore magna aliqua. Ut enim ad minim\n veniam, quis nostrud exercitation ullamco laboris nisi ut aliquip ex ea\n commodo consequat.\n </p>\n <p class=\"signature\">Surphy McBrah</p>\n </div>\n <div class=\"autoupdate\">\n Auto update:\n <input type=\"checkbox\" />\n </div>\n</div>\n```\n\n...and some CSS [here](https://hyperapp.dev/tutorial-assets/style.css).\n\nIt looks like this:\n\n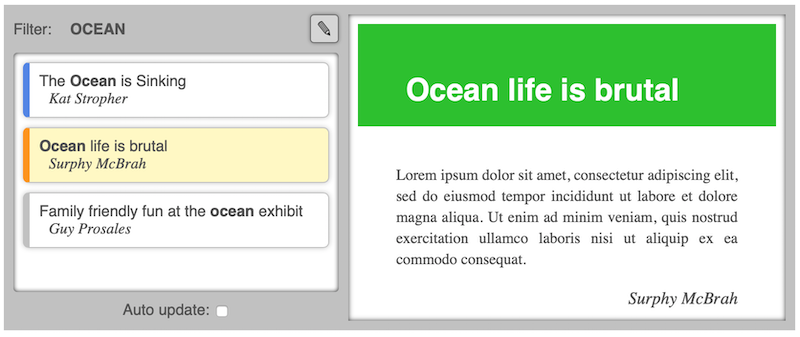\n\nWe'll start by making Hyperapp render the HTML for us. Then we will\nadd dynamic behavior to all the widgets, including text input and\ndynamically fetching stories.\n\nFirst, let's begin with the traditional \"Hello World!\"\n\n## Hello World <a name=\"helloworld\"></a>\n\nCreate this html file:\n\n```html\n<!DOCTYPE html>\n<html>\n <head>\n <link\n rel=\"stylesheet\"\n href=\"https://hyperapp.dev/tutorial-assets/style.css\"\n />\n <script type=\"module\">\n import { h, app } from \"https://unpkg.com/hyperapp\"\n\n // -- EFFECTS & SUBSCRIPTIONS --\n\n // -- ACTIONS --\n\n // -- VIEWS ---\n\n // -- RUN --\n app({\n node: document.getElementById(\"app\"),\n view: () => h(\"h1\", {}, [\"Hello \", h(\"i\", {}, \"World!\")]),\n })\n </script>\n </head>\n <body>\n <div id=\"app\"></div>\n </body>\n</html>\n```\n\n> The section structure outlined in the comments is not important. It's\n> just a suggestion for how to organize the code we'll be\n> adding throughout the tutorial.\n\nOpen it in a browser, and you'll be greeted with an optimistic **Hello _World!_**.\n\n## View <a name=\"view\"></a>\n\nLet's step through what just happened.\n\n### Virtual Nodes <a name=\"virtualnodes\"></a>\n\nHyperapp exports the `app` and `h` functions.\n`h` is for creating _virtual nodes_, which is to say: plain javascript objects\nwhich _represent_ DOM nodes.\n\nThe result of\n\n```js\nh(\"h1\", {}, [\"Hello \", h(\"i\", {}, \"World!\")])\n```\n\nis a virtual node, representing\n\n```html\n<h1>\n Hello\n <i>World!</i>\n</h1>\n```\n\n### Rendering to the DOM <a name=\"rendertodom\"></a>\n\n`app` is the function that runs our app. It is called with a single argument - an object\nwhich can take several properties. For now we're just concerned with `view` and `node.`\n\nHyperapp calls the `view` function which tells it the DOM structure we want, in the form\nof virtual nodes. Hyperapp proceeds to create it for us, replacing the node specified in `node`.\n\nTo render the HTML we want, change the `view` to:\n\n```js\nview: () => h(\"div\", {id: \"app\", class: \"container\"}, [\n h(\"div\", {class: \"filter\"}, [\n \" Filter: \",\n h(\"span\", {class: \"filter-word\"}, \"ocean\"),\n h(\"button\", {}, \"\\u270E\")\n ]),\n h(\"div\", {class: \"stories\"}, [\n h(\"ul\", {}, [\n h(\"li\", {class: \"unread\"}, [\n h(\"p\", {class: \"title\"}, [\n \"The \",\n h(\"em\", {}, \"Ocean\"),\n \" is Sinking!\"\n ]),\n h(\"p\", {class: \"author\"}, \"Kat Stropher\")\n ]),\n h(\"li\", {class: \"reading\"}, [\n h(\"p\", {class: \"title\"}, [\n h(\"em\", {}, \"Ocean\"),\n \" life is brutal\"\n ]),\n h(\"p\", {class: \"author\"}, \"Surphy McBrah\"),\n ]),\n h(\"li\", {}, [\n h(\"p\", {class: \"title\"}, [\n \"Family friendly fun at the \",\n h(\"em\", {}, \"ocean\"),\n \" exhibit\"\n ]),\n h(\"p\", {class: \"author\"}, \"Guy Prosales\")\n ])\n ])\n ]),\n h(\"div\", {class: \"story\"}, [\n h(\"h1\", {}, \"Ocean life is brutal\"),\n h(\"p\", {}, `\n Lorem ipsum dolor sit amet, consectetur adipiscing\n elit, sed do eiusmod tempor incididunt ut labore et\n dolore magna aliqua. Ut enim ad minim veniam, quis\n nostrud exercitation ullamco laboris nisi ut aliquip\n ex ea commodo consequat.\n `),\n h(\"p\", {class: \"signature\"}, \"Surphy McBrah\")\n ]),\n h(\"div\", {class: \"autoupdate\"}, [\n \"Auto update: \",\n h(\"input\", {type: \"checkbox\"})\n ])\n]),\n```\n\nTry it out to confirm that the result matches the screenshot above.\n\n> In many frameworks it is common to write your views/templates\n> using syntax that looks like HTML. This is possible with Hyperapp as well.\n> [JSX](https://babeljs.io/docs/en/babel-plugin-transform-react-jsx)\n> can compile a HTML-like syntax into `h` calls at build-time. If you'd rather\n> not use a build system, [htm](https://github.com/developit/htm) does the same at run-time.\n>\n> In this tutorial we'll stick with `h` to keep it simple and close to the metal.\n\n### Composing the view with reusable functions <a name=\"composingview\"></a>\n\nThe great thing about using plain functions to build up our virtual DOM\nis that we can break out repetitive or complicated parts into their own functions.\n\nAdd this function (in the \"VIEWS\" section):\n\n```js\nconst emphasize = (word, string) =>\n string.split(\" \").map(x => {\n if (x.toLowerCase() === word.toLowerCase()) {\n return h(\"em\", {}, x + \" \")\n } else {\n return x + \" \"\n }\n })\n```\n\nIt lets you change this:\n\n```js\n ...\n h(\"p\", {class: \"title\"}, [\n \"The \",\n h(\"em\", {}, \"Ocean\"),\n \" is Sinking!\"\n ]),\n ...\n```\n\ninto this:\n\n```js\n ...\n h(\"p\", {class: \"title\"}, emphasize(\"ocean\",\n \"The Ocean is Sinking\"\n ))\n ...\n```\n\nStory thumbnails are repeated several times, so encapsulate\nthem in their own function:\n\n```js\nconst storyThumbnail = props =>\n h(\n \"li\",\n {\n class: {\n unread: props.unread,\n reading: props.reading,\n },\n },\n [\n h(\"p\", { class: \"title\" }, emphasize(props.filter, props.title)),\n h(\"p\", { class: \"author\" }, props.author),\n ]\n )\n```\n\n> The last example demonstrates a helpful feature of the `class` property. When\n> you set it to an object rather than a string, each key with a truthy value\n> will become a class in the class list.\n\nContinue by creating functions for each section of the view:\n\n```js\nconst storyList = props =>\n h(\"div\", { class: \"stories\" }, [\n h(\n \"ul\",\n {},\n Object.keys(props.stories).map(id =>\n storyThumbnail({\n id,\n title: props.stories[id].title,\n author: props.stories[id].author,\n unread: !props.stories[id].seen,\n reading: props.reading === id,\n filter: props.filter,\n })\n )\n ),\n ])\n\nconst filterView = props =>\n h(\"div\", { class: \"filter\" }, [\n \"Filter:\",\n h(\"span\", { class: \"filter-word\" }, props.filter),\n h(\"button\", {}, \"\\u270E\"),\n ])\n\nconst storyDetail = props =>\n h(\"div\", { class: \"story\" }, [\n props && h(\"h1\", {}, props.title),\n props &&\n h(\n \"p\",\n {},\n `\n Lorem ipsum dolor sit amet, consectetur adipiscing\n elit, sed do eiusmod tempor incididunt ut labore et\n dolore magna aliqua. Ut enim ad minim veniam, qui\n nostrud exercitation ullamco laboris nisi ut aliquip\n ex ea commodo consequat.\n `\n ),\n props && h(\"p\", { class: \"signature\" }, props.author),\n ])\n\nconst autoUpdateView = props =>\n h(\"div\", { class: \"autoupdate\" }, [\n \"Auto update: \",\n h(\"input\", { type: \"checkbox\" }),\n ])\n\nconst container = content => h(\"div\", { class: \"container\" }, content)\n```\n\nWith those the view can be written as:\n\n```js\nview: () =>\n container([\n filterView({\n filter: \"ocean\",\n }),\n storyList({\n stories: {\n \"112\": {\n title: \"The Ocean is Sinking\",\n author: \"Kat Stropher\",\n seen: false,\n },\n \"113\": {\n title: \"Ocean life is brutal\",\n author: \"Surphy McBrah\",\n seen: true,\n },\n \"114\": {\n title: \"Family friendly fun at the ocean exhibit\",\n author: \"Guy Prosales\",\n seen: true,\n },\n },\n reading: \"113\",\n filter: \"ocean\",\n }),\n storyDetail({\n title: \"Ocean life is brutal\",\n author: \"Surphy McBrah\",\n }),\n autoUpdateView(),\n ])\n```\n\nWhat you see on the page should be exactly the same as before, because we haven't\nchanged what `view` returns. Using basic functional composition, we were able to make\nthe code a bit more manageable, and that's the only difference.\n\n## State <a name=\"state\"></a>\n\nWith all that view logic broken out in separate functions, `view` is starting to look like\nplain _data_. The next step is to fully separate data from the view.\n\nAdd an `init` property to your app, with this pure data:\n\n```js\n init: {\n filter: \"ocean\",\n reading: \"113\",\n stories: {\n \"112\": {\n title: \"The Ocean is Sinking\",\n author: \"Kat Stropher\",\n seen: false,\n },\n \"113\": {\n title: \"Ocean life is brutal\",\n author: \"Surphy McBrah\",\n seen: true,\n },\n \"114\": {\n title: \"Family friendly fun at the ocean exhibit\",\n author: \"Guy Prosales\",\n seen: true,\n }\n }\n },\n```\n\nThe value of `init` becomes the app's _state_. Hyperapp calls `view` with the state\nas an argument, so it can be reduced to:\n\n```js\n view: state => container([\n filterView(state),\n storyList(state),\n storyDetail(state.reading && state.stories[state.reading]),\n autoUpdateView(state),\n ]),\n```\n\nVisually, everything is _still_ the same. If you'd like to see a working example of the code so far, have a look [here](https://codesandbox.io/s/hyperapp-tutorial-step-1-gq662)\n\n## Actions <a name=\"actions\"></a>\n\nNow that we know all about rendering views, it's finally time for some _action_!\n\n### Reacting to events in the DOM <a name=\"reacting\"></a>\n\nThe first bit of dynamic behavior we will add is so that when you click\nthe pencil-button, a text input with the filter word appears.\n\nAdd an `onclick` property to the button in `filterView`:\n\n```js\nconst filterView = props =>\n h(\"div\", { class: \"filter\" }, [\n \"Filter:\",\n h(\"span\", { class: \"filter-word\" }, props.filter),\n h(\"button\", { onclick: StartEditingFilter }, \"\\u270E\"), // <---\n ])\n```\n\nThis makes Hyperapp bind a click-event handler on the button element, so\nthat when the button is clicked, an action named `StartEditingFilter` is\n_dispatched_. Create the action in the \"ACTIONS\" section:\n\n```js\nconst StartEditingFilter = state => ({ ...state, editingFilter: true })\n```\n\nActions are just functions describing transformations of the state.\nThis action keeps everything in the state the same except for `editingFilter`\nwhich it sets to `true`.\n\nWhen Hyperapp dispatches an action, it replaces the old state with the new\none calculated using the action. Then the DOM is modified to match what the\nview returns for this new state.\n\nWhen `editingFilter` is true, we want to have a text input instead of a\nspan with the filter word. We can express this in `filterView` using a\nternary operator (`a ? b : c`).\n\n```js\nconst filterView = props =>\n h(\"div\", { class: \"filter\" }, [\n \"Filter:\",\n\n props.editingFilter // <---\n ? h(\"input\", { type: \"text\", value: props.filter }) // <---\n : h(\"span\", { class: \"filter-word\" }, props.filter),\n\n h(\"button\", { onclick: StartEditingFilter }, \"\\u270E\"),\n ])\n```\n\nNow, when you click the pencil button the text input appears. But we still need to add\na way to go back. We need an action to `StopEditingFilter`, and a button to dispatch it.\n\nAdd the action:\n\n```js\nconst StopEditingFilter = state => ({ ...state, editingFilter: false })\n```\n\nand update `filterView` again:\n\n```js\nconst filterView = props =>\n h(\"div\", { class: \"filter\" }, [\n \"Filter:\",\n\n props.editingFilter\n ? h(\"input\", { type: \"text\", value: props.filter })\n : h(\"span\", { class: \"filter-word\" }, props.filter),\n\n props.editingFilter // <---\n ? h(\"button\", { onclick: StopEditingFilter }, \"\\u2713\")\n : h(\"button\", { onclick: StartEditingFilter }, \"\\u270E\"), // <---\n ])\n```\n\nWhen you click the pencil button, it is replaced with a check-mark button that can take you back to the first state.\n\n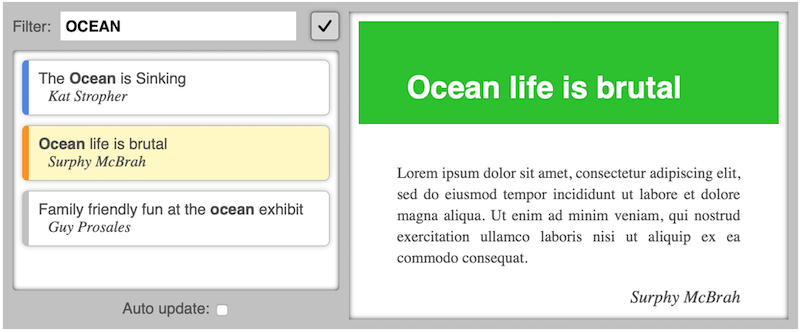\n\n### Capturing event-data in actions <a name=\"eventdata\"></a>\n\nThe next step is to use the input for editing the filter word. Whatever we\ntype in the box should be emphasized in the story-list.\n\nUpdate `filterView` yet again:\n\n```js\nconst filterView = props =>\n h(\"div\", { class: \"filter\" }, [\n \"Filter:\",\n\n props.editingFilter\n ? h(\"input\", {\n type: \"text\",\n value: props.filter,\n oninput: SetFilter, // <----\n })\n : h(\"span\", { class: \"filter-word\" }, props.filter),\n\n props.editingFilter\n ? h(\"button\", { onclick: StopEditingFilter }, \"\\u2713\")\n : h(\"button\", { onclick: StartEditingFilter }, \"\\u270E\"),\n ])\n```\n\nThis will dispatch the `SetFilter` action everytime someone types in the input. Implement the action like this:\n\n```js\nconst SetFilter = (state, event) => ({ ...state, filter: event.target.value })\n```\n\nThe second argument to an action is known as the _payload_. Actions\ndispatched in response to an events on DOM elements receive the [event object](https://developer.mozilla.org/en-US/docs/Web/API/Event) for a payload. `event.target` refers to the input element in the DOM, and\n`event.target.value` refers to the current value entered into it.\n\nNow see what happens when you erase \"ocean\" and type \"friendly\" instead:\n\n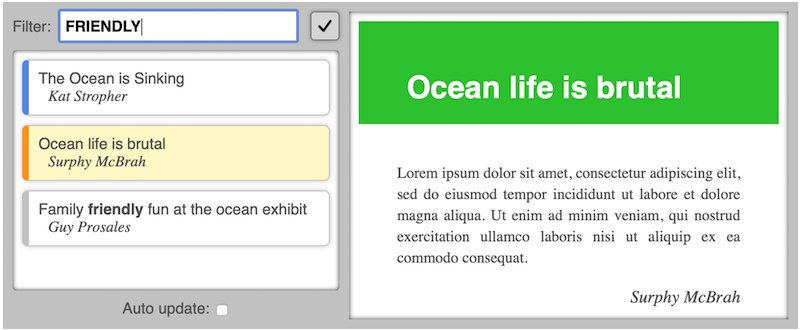\n\n### Actions with custom payloads <a name=\"custompayloads\"></a>\n\nNext up: selecting stories by clicking them in the list.\n\nThe following action sets the `reading` property in the state to a story-id, which amounts to \"selecting\" the story:\n\n```js\nconst SelectStory = (state, id) => ({ ...state, reading: id })\n```\n\nIt has a payload, but it's not an event object. It's a custom value telling us which\nstory was clicked. How are actions dispatched with custom payloads? – Like this:\n\n```js\nconst storyThumbnail = props =>\n h(\n \"li\",\n {\n onclick: [SelectStory, props.id], // <----\n class: {\n unread: props.unread,\n reading: props.reading,\n },\n },\n [\n h(\"p\", { class: \"title\" }, emphasize(props.filter, props.title)),\n h(\"p\", { class: \"author\" }, props.author),\n ]\n )\n```\n\nInstead of just specifying the action, we give a length-2 array with the action first and the custom payload second.\n\nSelecting stories works now, but the feature is not quite done. When a story is selected,\nwe need to set its `seen` property to `true`, so we can highlight which stories the user has yet to read. Update the `SelectStory` action:\n\n```js\nconst SelectStory = (state, id) => ({\n ...state, // keep all state the same, except for the following:\n reading: id,\n stories: {\n ...state.stories, //keep stories the same, except for:\n [id]: {\n ...state.stories[id], //keep this story the same, except for:\n seen: true,\n },\n },\n})\n```\n\nNow, when you select a blue-edged story it turns yellow because it is selected, and when you select something else,\nthe edge turns gray to indicate you've read the story.\n\n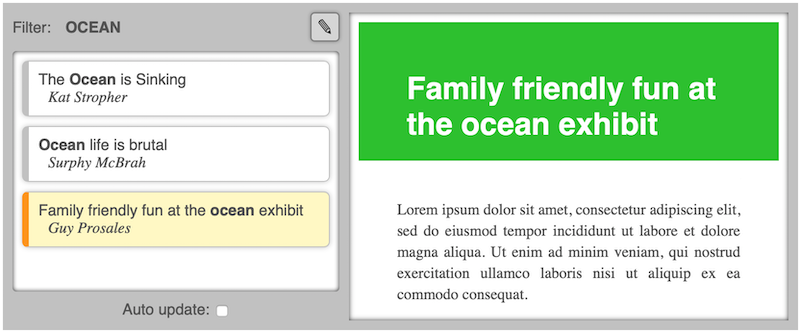\n\n### Payload filters <a name=\"payloadfilters\"></a>\n\nThere's one little thing we should fix about `SetFilter`. See how it's dependent on the complex `event` object?\nIt would be easier to test and reuse if it were simply:\n\n```js\nconst SetFilter = (state, word) => ({ ...state, filter: word })\n```\n\nBut we don't know the word beforehand, so how can we set it as a custom payload? Change the `Filter` view\nagain (last time - I promise!):\n\n```js\nconst filterView = props =>\n h(\"div\", { class: \"filter\" }, [\n \"Filter:\",\n\n props.editingFilter\n ? h(\"input\", {\n type: \"text\",\n value: props.filter,\n oninput: [SetFilter, event => event.target.value], // <----\n })\n : h(\"span\", { class: \"filter-word\" }, props.filter),\n\n props.editingFilter\n ? h(\"button\", { onclick: StopEditingFilter }, \"\\u2713\")\n : h(\"button\", { onclick: StartEditingFilter }, \"\\u270E\"),\n ])\n```\n\nWhen we give a _function_ as the custom payload, Hyperapp considers it a _payload filter_ and passes the default\npayload through it, providing the returned value as payload to the action.\n\n> Payload filters are also useful when you need a payload that is a combination of custom data and event data\n\nIf you'd like to see a working example of the code so far, have a look [here](https://codesandbox.io/s/hyperapp-tutorial-step-2-5yv34)\n\n## Effects <a name=\"effects\"></a>\n\nSo far, the list of stories has been defined in the state and doesn't change. What we really want is\nwhen we're done changing the filter-word, stories matching it should be loaded.\n\nBefore looking at how we make the request for new stories, one thing is for sure: when new stories\ncome back they need to go into the state, and the only way to modify the state is through an action.\nSo we're definitely going to need the following action:\n\n```js\nconst GotStories = (state, stories) => ({\n ...state,\n\n // replace old stories with new,\n // but keep the 'seen' value if it exists\n stories: Object.keys(stories)\n .map(id => [\n id,\n {\n ...stories[id],\n seen: state.stories[id] && state.stories[id].seen,\n },\n ])\n .reduce((o, [id, story]) => ((o[id] = story), o), {}),\n\n // in case the current story is in the new list as well,\n // keep it selected, Otherwise select nothing\n reading: stories[state.reading] ? state.reading : null,\n})\n```\n\n### Declaring effects in actions <a name=\"declaringeffects\"></a>\n\nOur request for new stories should go out once we're done editing the filter, which is to say: when we click\nthe check-mark button and `StopEditingFilter` is dispatched. When an action needs to do something\nbesides transforming the state, that \"something\" is called an _effect_. To associate an effect\nwith `StopEditingFilter`, make it return an array like this:\n\n```js\nconst StopEditingFilter = state => [\n {\n ...state,\n editingFilter: false,\n },\n\n // effect declarations go here: //\n]\n```\n\nWhen an action returns an array, Hyperapp understands that the first item is the new state we want, and\nthe rest are _effect declarations_. Hyperapp takes care of running all declared effects once the state\nhas been updated.\n\nAdd this effect declaration:\n\n```js\nconst StopEditingFilter = state => [\n {\n ...state,\n editingFilter: false,\n },\n\n // effect declarations go here: //\n [\n fetchJSONData,\n {\n url: `https://hyperapp.dev/tutorial-assets/stories/${state.filter.toLowerCase()}.json`,\n onresponse: GotStories,\n },\n ],\n]\n```\n\nThe first item in an effect declaration – here `fetchJSONData` – is the\n_effect function_ that we want Hyperapp to call. The second item contains\nthe options we want passed to effect function when it's called. Here, we are\ntelling `fetchJSONData` where the stories for the current filter are, and\nto dispatch them as payload to `GotStories`, on response.\n\n### Effect functions and `dispatch` <a name=\"effectfunctions\"></a>\n\nNow we just need to implement `fetchJSONData`. Type this in the \"EFFECTS & SUBSCRIPTIONS\" section:\n\n```js\nconst fetchJSONData = (dispatch, options) =>\n fetch(options.url)\n .then(response => response.json())\n .then(data => dispatch(options.onresponse, data))\n .catch(() => dispatch(options.onresponse, {}))\n```\n\n> It's a good practice to write your effect functions generically like this, rather than\n> hardcoding options. That way it can be used for multiple situations, even by others\n> if you chose to publish it.\n>\n> ...speaking of which: make sure to check out the available effects published by members of the\n> Hyperapp community, and perhaps save yourself some trouble implementing everything yourself.\n\nWhen Hyperapp calls an effect function, it passes the `dispatch` function to it as the first\nargument. `dispatch` is how effect functions are able to \"report back\" to the app, by dispatching\nactions (first argument) with payloads (second argument)\n\nNow, go ahead and try it out! Enter \"life\" in the filter input. When you click the check-mark button some new\nstories are loaded – all with blue edges except for \"Ocean life is brutal\" because it is\nstill selected.\n\n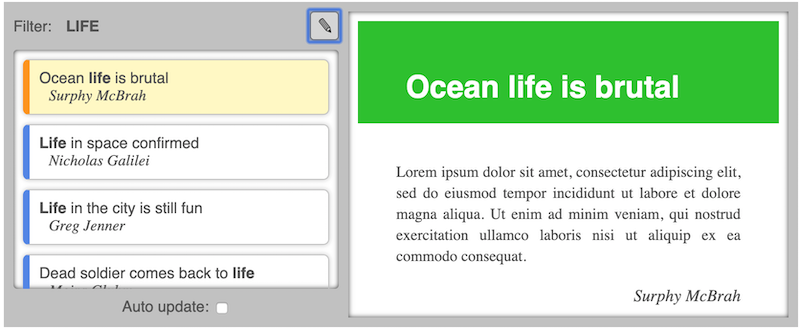\n\n### Running effects on initialization <a name=\"effectsoninit\"></a>\n\nThe next obvious step is to load the _initial_ stories from the API as well. Change init to this:\n\n```js\n init: [\n {\n editingFilter: false,\n autoUpdate: false,\n filter: \"ocean\",\n reading: null,\n stories: {}, // <---\n },\n [ // <---\n fetchJSONData, // <---\n { // <---\n url: `https://hyperapp.dev/tutorial-assets/stories/ocean.json`, // <---\n onresponse: GotStories // <---\n } // <---\n ] // <---\n ],\n```\n\nThe point here is that init works just like the return value of an action, including\ncalling effects when it is given as an array. If you reload the page you'll see\n(after a moment) that all the same stories appear, despite them not existing in\nthe state initially.\n\n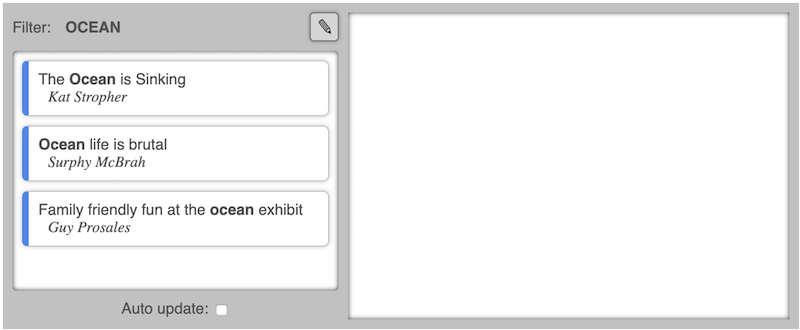\n\n### Effect creators <a name=\"effectcreators\"></a>\n\nHowever, repeating the effect declaration in all its gory detail like this\nis not ideal, so lets add this _effect creator_\n\n```js\nconst storyLoader = searchWord => [\n fetchJSONData,\n {\n url: `https://hyperapp.dev/tutorial-assets/stories/${searchWord.toLowerCase()}.json`,\n onresponse: GotStories,\n },\n]\n```\n\nNow we can simplify `StopEditingFilter` like this:\n\n```js\nconst StopEditingFilter = state => [\n {\n ...state,\n editingFilter: false,\n },\n storyLoader(state.filter),\n]\n```\n\n... and `init:` like this:\n\n```js\n init: [\n {\n editingFilter: false,\n autoUpdate: false,\n filter: \"ocean\",\n reading: null,\n stories: {},\n },\n storyLoader(\"ocean\")\n ],\n```\n\n### Tracking state for asynchronous effects <a name=\"trackingasync\"></a>\n\nIf we could display a spinner while we wait for stories to load, it would make for a smoother user experience. We'll need a state property to tell us wether or not we're currently `fetching`, and we'll use this action to keep track of it:\n\n```js\nconst SetFetching = (state, fetching) => ({ ...state, fetching })\n```\n\nUpdate `storyLoader` to tell `fetchJSONData` about `SetFetching`\n\n```js\nconst storyLoader = searchWord => [\n fetchJSONData,\n {\n url: `https://hyperapp.dev/tutorial-assets/stories/${searchWord.toLowerCase()}.json`,\n onresponse: GotStories,\n onstart: [SetFetching, true], // <----\n onfinish: [SetFetching, false], // <----\n },\n]\n```\n\nFinally update `fetchJSONData` to use the new `onstart` and `onfinish` options to notify when fetches start and end:\n\n```js\nconst fetchJSONData = (dispatch, options) => {\n dispatch(options.onstart) // <---\n fetch(options.url)\n .then(response => response.json())\n .then(data => dispatch(options.onresponse, data))\n .catch(() => dispatch(options.onresponse, {}))\n .finally(() => dispatch(options.onfinish)) // <---\n}\n```\n\nWith that, our state prop `fetching` will always tell us wether or not we are fetching.\nUse that to show a spinner when we are fetching, in `storyList`:\n\n```js\nconst storyList = props =>\n h(\"div\", { class: \"stories\" }, [\n // show spinner overlay if fetching\n props.fetching &&\n h(\"div\", { class: \"loadscreen\" }, [h(\"div\", { class: \"spinner\" })]),\n\n h(\n \"ul\",\n {},\n Object.keys(props.stories).map(id =>\n storyThumbnail({\n id,\n title: props.stories[id].title,\n author: props.stories[id].author,\n unread: !props.stories[id].seen,\n reading: props.reading === id,\n filter: props.filter,\n })\n )\n ),\n ])\n```\n\nWhen the app loads, and when you change the filter, you should see the spinner appear until the stories are loaded.\n\n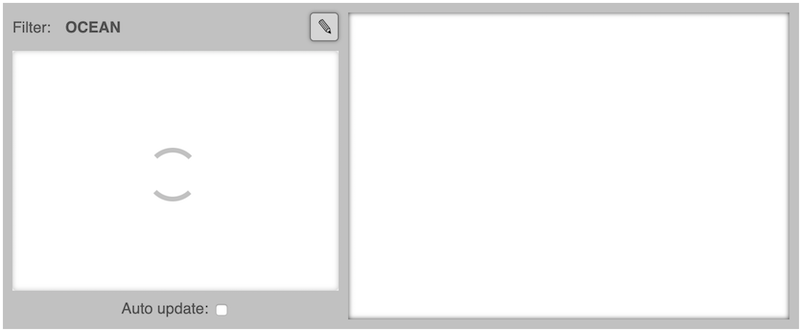\n\n> If you aren't seeing the spinner, it might just be happening too fast. Try choking your network speed. In the Chrome\n> browser you can set your network speed to \"slow 3g\" under the network tab in the developer tools.\n\nIf you'd like to see a working example of the code so far, have a look [here](https://codesandbox.io/s/hyperapp-tutorial-step-3-2mmug)\n\n## Subscriptions <a name=\"subscriptions\"></a>\n\nThe last feature we'll add is one where the user can opt in to have the app check every five seconds for new\nstories matching the current filter. (There won't actually be any new stories, because it's not a real service,\nbut you'll know it's happening when you see the spinner pop up every five seconds.)\n\nFirst let's keep track of wether or not the user wants this auto-update feature on. Create a new action:\n\n```js\nconst ToggleAutoUpdate = state => ({ ...state, autoUpdate: !state.autoUpdate })\n```\n\nDispatch it in response to checking the checkbox in `autoUpdateView`:\n\n```js\nconst autoUpdateView = props =>\n h(\"div\", { class: \"autoupdate\" }, [\n \"Auto update: \",\n h(\"input\", {\n type: \"checkbox\",\n checked: props.autoUpdate, // <---\n oninput: ToggleAutoUpdate, // <---\n }),\n ])\n```\n\nWith that, the state property `autoUpdate` will tell us wether or not the Auto-update checkbox is checked.\n\n### Subscription functions <a name=\"subscriptionfunctions\"></a>\n\nWe need a _subscription function_ capable of dispatching actions at a given interval. Implement\n`intervalSubscription` in the \"EFFECTS & SUBSCRIPTIONS\" section:\n\n```js\nconst intervalSubscription = (dispatch, options) => {\n const interval = setInterval(() => dispatch(options.action), options.time)\n return () => clearInterval(interval)\n}\n```\n\nJust like an effect function, this function will be called by Hyperapp with `dispatch` and given options. It\nwill start an interval listener, and every `options.time` milliseconds, it will dispatch the given action. The\nmain difference to an effect function is that a subscription function returns a function so hyperapp knows\nhow to stop the subscription.\n\n> As with effects, you may find a suitable subscription already published\n> in the Hyperapp community.\n\n### Subscribing <a name=\"subscribing\"></a>\n\nWe could create a new action for updating stories, but since `StopEditingFilter` already does what we want, we'll\nuse it here too. Add a `subscription` property to the app:\n\n```js\nsubscriptions: state => [\n state.autoUpdate &&\n !state.editingFilter && [\n intervalSubscription,\n {\n time: 5000, //milliseconds,\n action: StopEditingFilter,\n },\n ],\n]\n```\n\nJust like for `view`, hyperapp will run `subscriptions` with the new state every time it changes, to get\na list of subscription-declarations that should be active. In our case, whenever the Auto Update checkbox is\nchecked and we are _not_ busy editing the filter, our interval subscription will be active.\n\n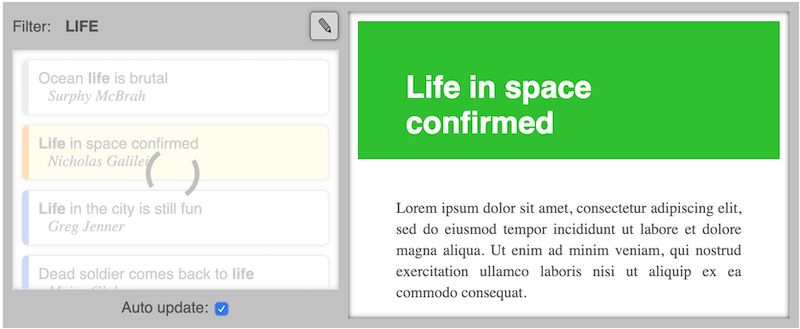\n\nHyperapp will only stop or start subscriptions when the declaration changes\nfrom one state to the next. Subscriptions are _not_ stopped and started _every_ time the state changes.\n\nIf you'd like to see a working example of the final code, have a look [here](https://codesandbox.io/s/hyperapp-tutorial-step-4-8u9q8)\n\n## Conclusion <a name=\"conclusion\"></a>\n\nCongratulations on completing this Hyperapp tutorial!\n\nAlong the way you've familiarized yourself with\nthe core concepts: _view_, _state_, _actions_, _effects_ & _subscriptions_. And that's really all you need to\nbuild any web application.\n"} |